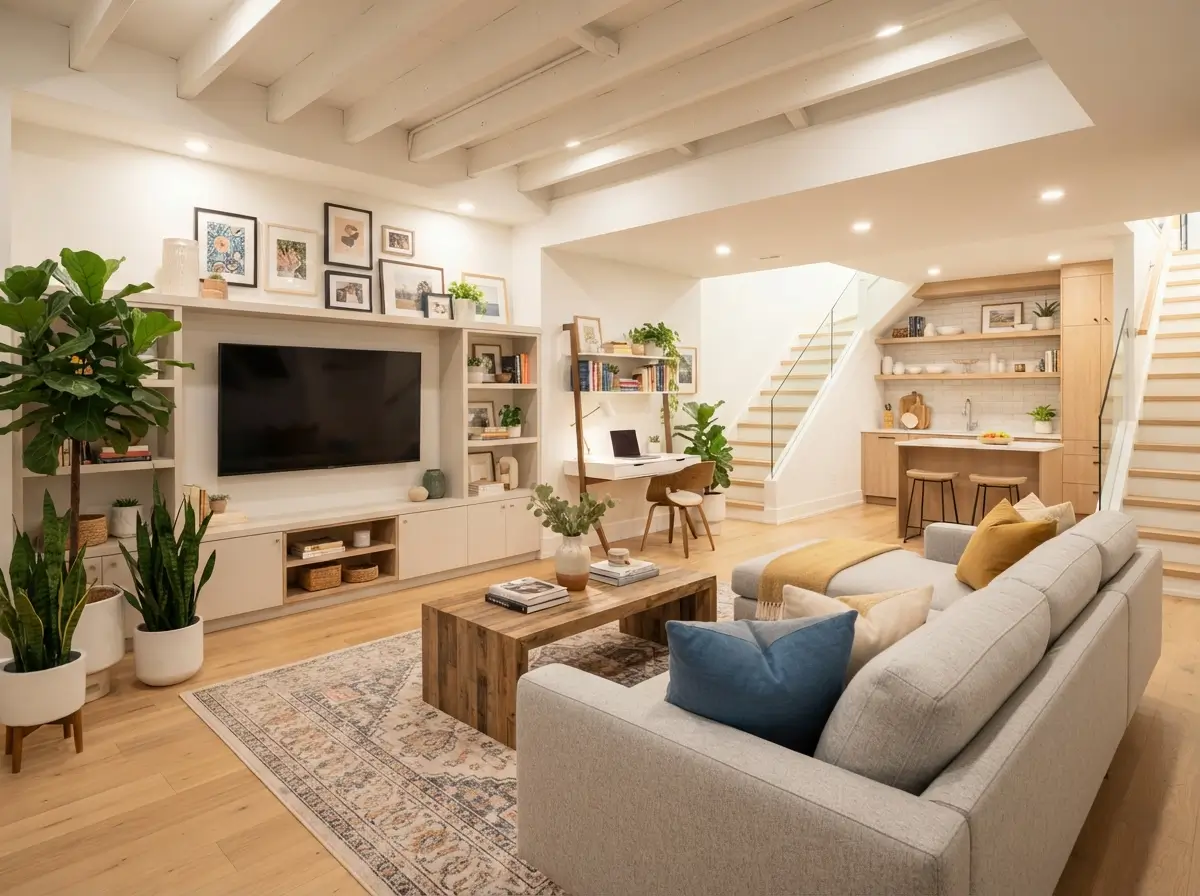

Lower levels often feel darker, colder and more crowded than the rest of a home, yet those problems usually come from poor planning rather than the room itself. Thoughtful lighting, lighter finishes, correctly scaled furniture and smart storage can turn an underused floor into a comfortable living area. Successful decorating starts with the practical details first, including moisture control, ceiling height, electrical access and walking paths. Once those basics are clear, colour and furniture choices become much easier.
Homeowners do not need a full renovation budget to improve the space. Paint, layered lamps, washable rugs, wall-mounted storage and simple zoning can make a noticeable difference. Renters can also use removable wallpaper, plug-in sconces, tension rods and freestanding shelves without changing permanent surfaces. The ideas below focus on realistic improvements that suit family rooms, guest spaces, play zones, offices and multipurpose rooms.
What Is the Best Way to Plan a Basement Makeover?
Start by deciding how the room needs to function before choosing paint or furniture. Measure the walls, ceiling height, windows, doors, support posts and utility areas. Mark the main walking route, then divide the floor into clear zones for seating, work, storage or play. Brightness improves when furniture does not block windows and lighting reaches every corner. Pale wall colours, warm white bulbs and reflective surfaces help distribute light without making the room feel clinical.
Quick answer: the most effective basement makeover combines moisture-safe materials, layered lighting, light-reflective colours, correctly sized furniture and practical storage. Work from the room’s biggest limitation first. Dampness needs attention before rugs, low ceilings require slim fixtures and awkward layouts benefit from zoning. Small improvements work best when they solve a real problem instead of simply adding decoration.
Start With a Light Reflective Colour Plan

Colour affects brightness more than almost any decorative choice. Soft white, pale greige, warm ivory and light mushroom tones reflect limited daylight while keeping the room comfortable. Cool grey can look flat in a window-poor space, especially under blue-toned bulbs. Test paint on several walls and check it during the morning, afternoon and evening because artificial light changes undertones.
Practical combinations include warm white walls with soft taupe furniture, creamy beige walls with muted blue accents or pale greige with light oak. Use one main wall colour throughout connected areas to prevent visual breaks. Add contrast through cushions, artwork and small furniture rather than dark feature walls. This approach suits beginners and anyone working with low ceilings because it keeps surfaces visually open.
Sample boards are worth the small effort. Paint two coats on card, move the cards around the room and compare them beside flooring and furniture. Looking at movable samples prevents one shadowed wall from influencing the entire colour decision.
Layer Three Types of Lighting
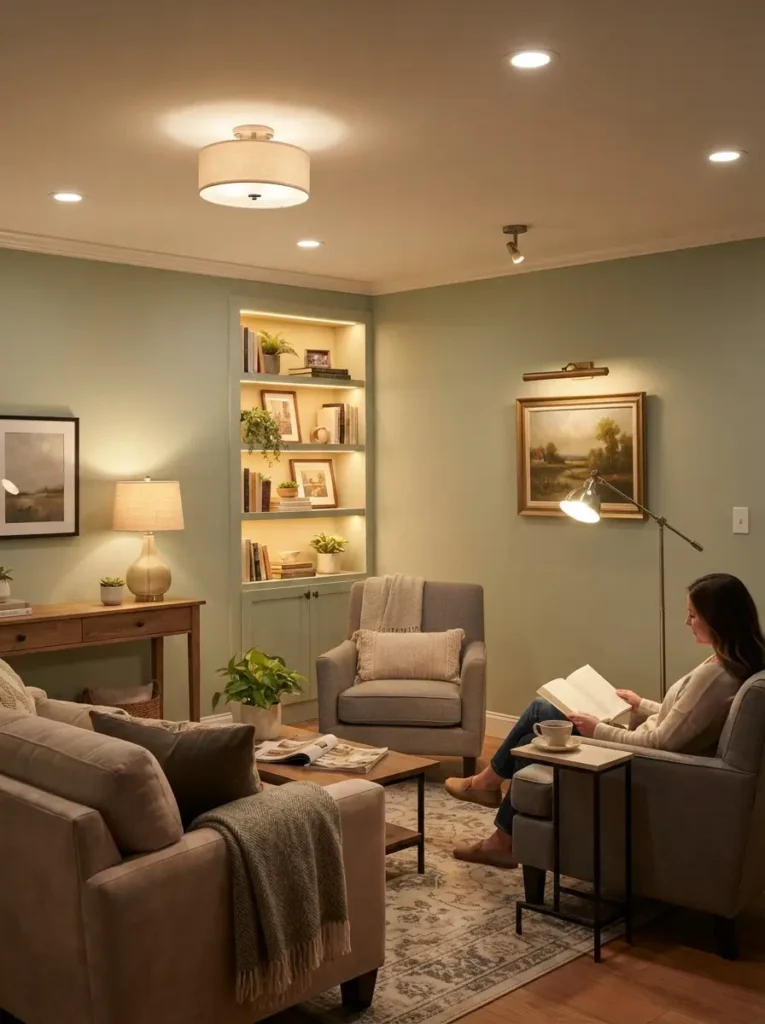
Single ceiling fixtures create harsh pools of light and leave corners gloomy. Better results come from combining ambient, task and accent lighting. Ambient light fills the whole room, task light supports reading or work and accent light highlights shelves, artwork or textured walls. Recessed lights, flush-mount fixtures and slim track systems work well where ceiling height is limited.
Choose bulbs between 2700K and 3000K for lounge spaces, then use 3000K to 3500K near desks, craft tables or laundry areas. Matching bulb temperatures keeps the room consistent. Add floor lamps beside sofas, table lamps on consoles and plug-in sconces near reading chairs. Renters can use adhesive cable channels to keep cords neat. Layered lighting works especially well for people who use the room at different times of day.
Dimmer switches or dimmable plug-in lamps add useful control for films, homework and entertaining. Keep brighter task lights separate from general lighting so one person can read while others relax. Strong overhead light alone rarely offers that flexibility.
Keep Window Areas Open and Simple

Small basement windows need every available centimetre of light. Heavy curtains, tall furniture and deep valances reduce daylight and make the wall feel lower. Choose simple roller blinds, light-filtering cellular shades or short curtains mounted just above the frame. White, oatmeal and pale linen shades brighten the opening without creating glare.
Position low furniture under windows whenever possible. Benches, compact media units and storage cubes allow light to travel farther than bookcases or wardrobes. Hanging a mirror on the wall opposite a window can also reflect daylight into the centre of the room. Avoid placing a mirror where it reflects exposed pipes or clutter. Window-focused planning is best for narrow rooms and walkout basements with limited natural light.
Window wells also affect the view from inside. Clean debris, use pale gravel where suitable and keep plants trimmed outside the glass. Even a tidy well can make the opening feel larger and prevent the window from reading as a neglected utility feature.
Create Clear Zones Without Building Walls

Open lower levels often feel unfinished because several activities happen in one large room. Zoning gives each function a clear place without reducing space. Use rugs, furniture direction, ceiling lights and shelving to define a television area, desk corner, play zone or reading area. Keep at least 75 to 90 centimetres for main walkways so people can move around furniture comfortably.
Turn the sofa toward the television, place a narrow console behind it and use the console as a visual boundary. Position a desk perpendicular to the wall instead of squeezing it into a dark corner. Open shelving can divide areas while allowing light through. Zoning works well for families, shared homes and anyone who needs one room to support several daily routines.
Sound should influence zone placement too. Keep desks and reading chairs away from speakers, games tables and children’s play storage. Soft rugs, curtains and upholstered seating can reduce echo between areas without adding solid partitions.
Choose Furniture With Visible Legs
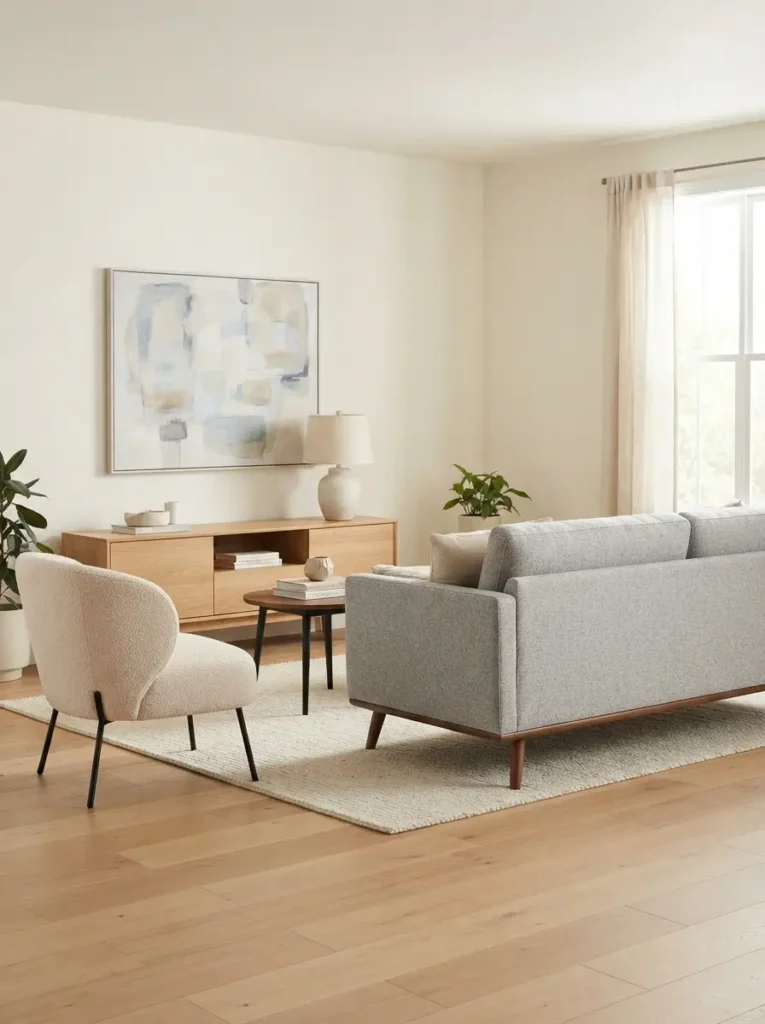
Bulky furniture that sits directly on the floor can make a low room feel heavy. Sofas, chairs and cabinets with visible legs create small gaps that help the floor appear continuous. Mid-height legs also make cleaning easier and prevent the furniture from looking permanently fixed in place. Avoid very delicate pieces if the room serves children or regular guests.
Look for a compact sofa between 180 and 210 centimetres wide, an armless accent chair or a storage ottoman that can move easily. Light oak, natural walnut and matte black legs pair well with neutral upholstery. Leave a few centimetres between large pieces and walls to reduce the boxed-in feeling. This choice suits smaller rooms and layouts with several support columns.
Scale matters as much as style. Measure seat depth, arm width and clearance around open doors before choosing a sofa. Narrow arms often provide more usable seating than wide rolled arms while occupying the same overall footprint.
Use One Large Rug Instead of Several Tiny Ones
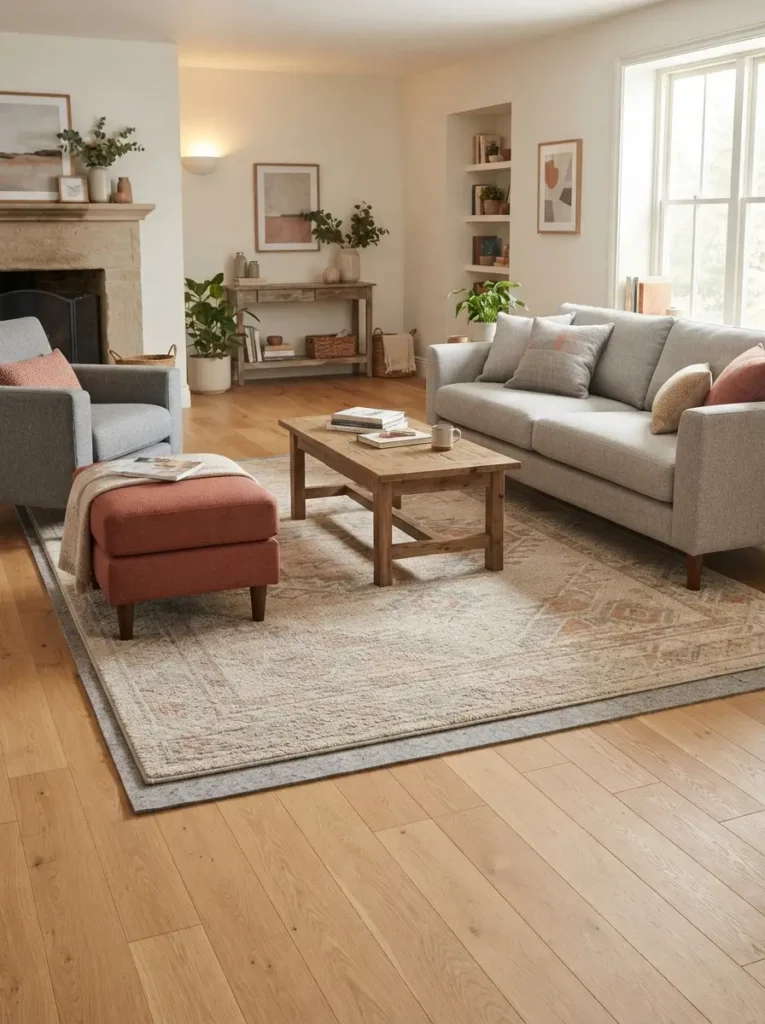
Small rugs break the floor into disconnected patches and can make the room look narrower. One correctly sized rug anchors the seating area and brings warmth to hard flooring. Front sofa legs and chair legs should sit on the rug, creating a single visual group. In many average family rooms, a 200 by 300 centimetre rug works better than a small coffee-table rug.
Choose low-pile polypropylene, washable flatweave or carpet tiles if moisture and spills are concerns. Warm beige, soft grey, muted terracotta and subtle geometric patterns hide everyday marks without darkening the floor. Place a breathable rug pad underneath to reduce slipping. Rug sizing matters most for open spaces where furniture otherwise appears scattered.
Basement floors can feel cool even when the air temperature is comfortable. Rug pads with slight cushioning improve warmth underfoot and help furniture stay stable. Avoid trapping visible moisture beneath any textile, and lift rugs periodically during the first few months.
Add Warm Wood Tones for Balance
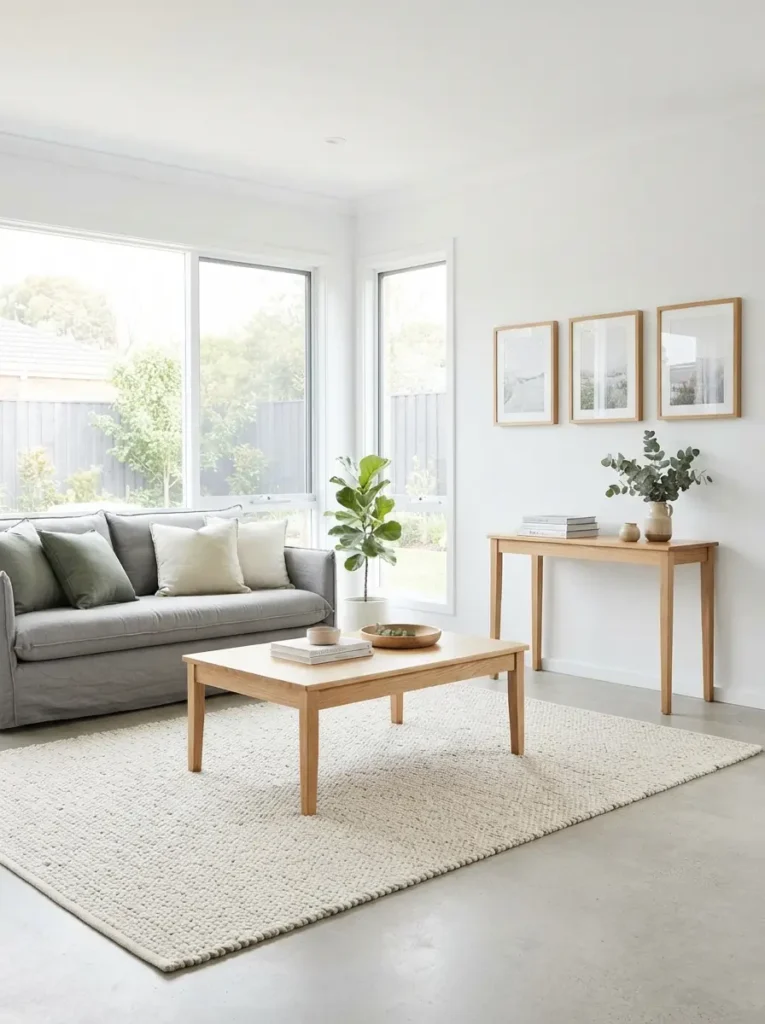
Bright rooms can still feel cold when every surface is white, grey or glossy. Warm wood introduces natural variation and softens hard finishes such as concrete, vinyl and painted drywall. Light oak, ash, maple and medium walnut work well because they add depth without absorbing too much light. Repeating the same wood tone in two or three places makes the design feel intentional.
Try a light oak coffee table, matching picture frames and a slim console. Renters can use peel-and-stick wood-look panels on a removable board rather than applying them directly to the wall. Avoid mixing several orange, red and grey woods in one small room. Warm timber details suit anyone searching for cozy basement design ideas that still feel clean and bright.
Finishes look more believable when their undertones relate to the flooring. Honey oak pairs naturally with cream and muted green, while ash works well with greige and blue. Carry a flooring sample when shopping so wood tones do not clash under store lighting.
Turn Support Posts Into Useful Features

Structural posts often interrupt furniture placement, but they can become part of the design. Paint a post the same colour as the walls to reduce contrast or wrap it in simple wood slats for a stronger feature. Keep any treatment slim because thick boxing can make circulation harder. Check access requirements before covering structural or mechanical elements.
Nearby space can hold a narrow shelf, bar-height ledge or small reading lamp. Two posts may frame a games area, home bar or craft station. Avoid attaching heavy cabinetry without confirming the structure and fixings. Post-focused planning works best in open basements where obstacles cannot be removed but can help organise the layout.
Visibility around posts remains important. Rounded furniture and open shelving reduce collision points near busy paths. In children’s areas, padded removable wraps can soften hard edges without permanently changing the structure.
Build Storage Upward Instead of Outward
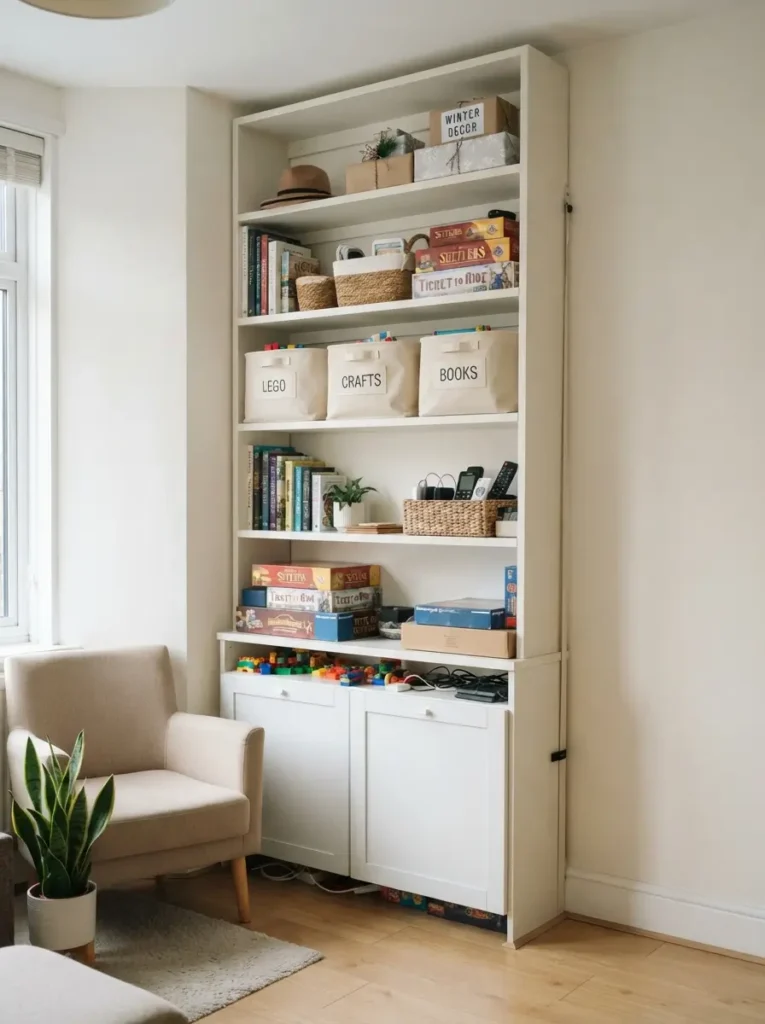
Floor area disappears quickly when storage units are deep and scattered. Tall, shallow cabinets use vertical space while preserving walking room. Shelves between 25 and 35 centimetres deep can hold books, baskets, games and decor without projecting too far. Secure tall furniture to suitable wall points, especially in homes with children.
Match storage colour to the wall for a quieter appearance. Closed lower cabinets hide toys and cables while open upper shelves keep the room from feeling solid. Labelled fabric bins help families maintain order without complicated systems. Renters can choose freestanding ladder shelves or tension-pole storage. Vertical storage benefits narrow rooms, hobby spaces and busy family areas.
Frequently used items belong between waist and eye level. Seasonal supplies can sit higher, while heavy objects should remain low. That arrangement makes shelves safer and prevents everyday storage from becoming inconvenient after the first few weeks.
Use Removable Wall Treatments for Character
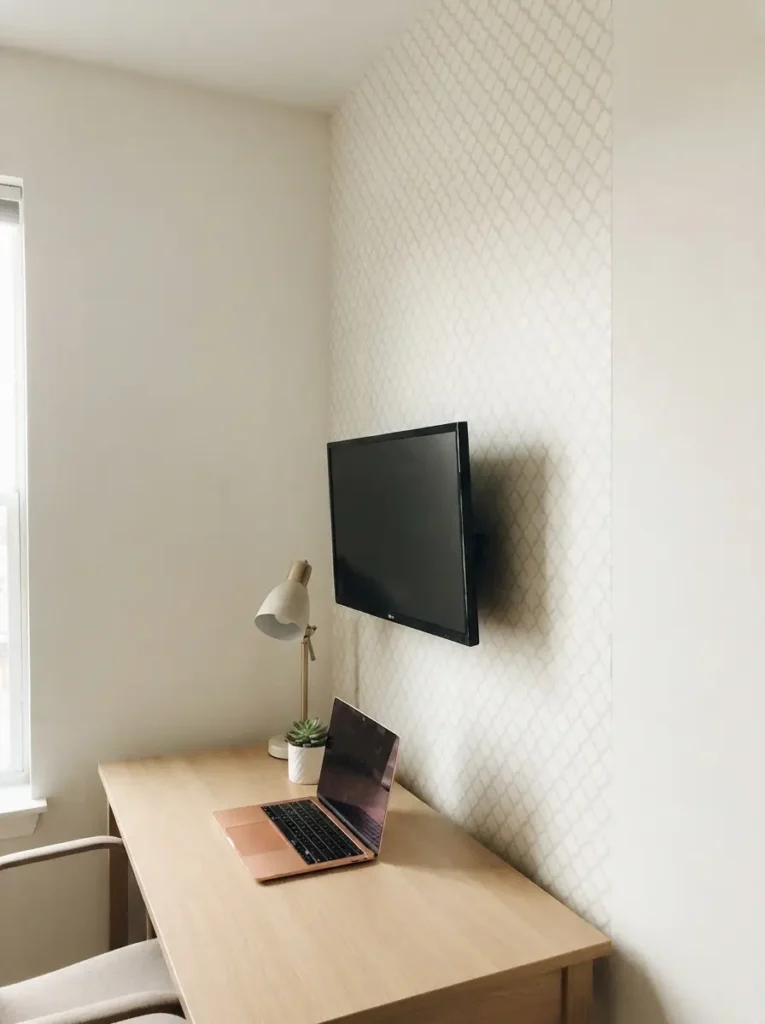
Plain drywall can feel unfinished, yet permanent panelling may not suit every budget or rental agreement. Removable wallpaper, peel-and-stick murals and temporary fabric panels add pattern without major construction. Choose low-contrast designs because bold repeats can overwhelm short walls. Thin stripes, soft botanical prints and small geometric patterns tend to work well.
Apply the treatment to one contained area, such as behind a desk, media unit or reading chair. Prepare the surface carefully and test a small section first because adhesion varies on textured paint. Removable treatments are especially useful for renters and people who like changing decor every few years. Many unfinished basement ideas on a budget rely on one strong wall rather than expensive changes across the whole room.
Pattern scale should match viewing distance. Small prints suit close-up desk corners, while broader shapes read better behind a sofa. Order one sample sheet first and view it from the room entrance before covering a full wall.
Select Low Profile Seating for Short Ceilings

Tall sofa backs and oversized recliners can exaggerate low ceiling height. Lower seating keeps more wall visible and improves sight lines across the room. Look for sofas with backs around 75 to 85 centimetres high, compact arms and firm cushions. Deep sectional sofas may be comfortable, but they often consume the main walkway in smaller layouts.
Pair a low sofa with an oval coffee table, which reduces sharp corners and improves movement. Modular seating can adapt when the room changes from movie night to guest use. Measure stairways and door openings before buying large pieces because basement access can be tight. Low-profile furniture is best for television rooms, teen lounges and multipurpose family spaces.
Seat comfort still deserves attention. Low backs may need firm lumbar cushions, especially for older users or long film sessions. Test the seat height and depth in person when possible rather than choosing only from online photographs.
Make the Ceiling Feel Intentional

Ceilings often contain pipes, beams, ducts and access panels. Hiding everything may be expensive, so a consistent finish can be more practical. Painting an open ceiling in one matte colour reduces visual clutter by making separate elements read as a single surface. Soft white brightens the room while charcoal can suit taller spaces with strong lighting.
Use slim flush-mount fixtures or recessed lights where code and structure allow. Avoid dangling pendants in walking areas below low ceilings. Acoustic panels, painted beadboard or lightweight ceiling tiles can improve appearance and sound control. Before painting pipes or ducts, confirm which materials require access or special coatings. Ceiling planning suits partly finished rooms where a clean result matters more than complete concealment.
Contrast can be useful when the ceiling height allows it. Dark paint hides wiring and creates a cinema-like effect, but it needs generous wall lighting and pale flooring. Low or windowless rooms usually benefit more from a lighter overhead finish.
Add Mirrors Where They Can Reflect Light

Mirrors increase brightness by bouncing light toward darker parts of the room. Placement matters more than size. Hang one opposite a window, beside a floor lamp or above a console where it reflects an open area. Reflecting a blank wall adds little value, while reflecting storage clutter can make the room look busier.
Choose one large rectangular mirror instead of several small pieces for a calmer effect. Rounded corners soften rooms with many straight architectural lines. Secure heavy mirrors properly and avoid leaning them where children or pets may knock them. Mirror placement works well for small lounges, basement bedrooms and entry areas at the bottom of the stairs.
Frames influence the final effect. Thin wood, brass or black frames add definition without becoming heavy. Frameless mirrors feel quieter in compact spaces, though polished edges and safe mounting remain important.
Design a Flexible Media Wall
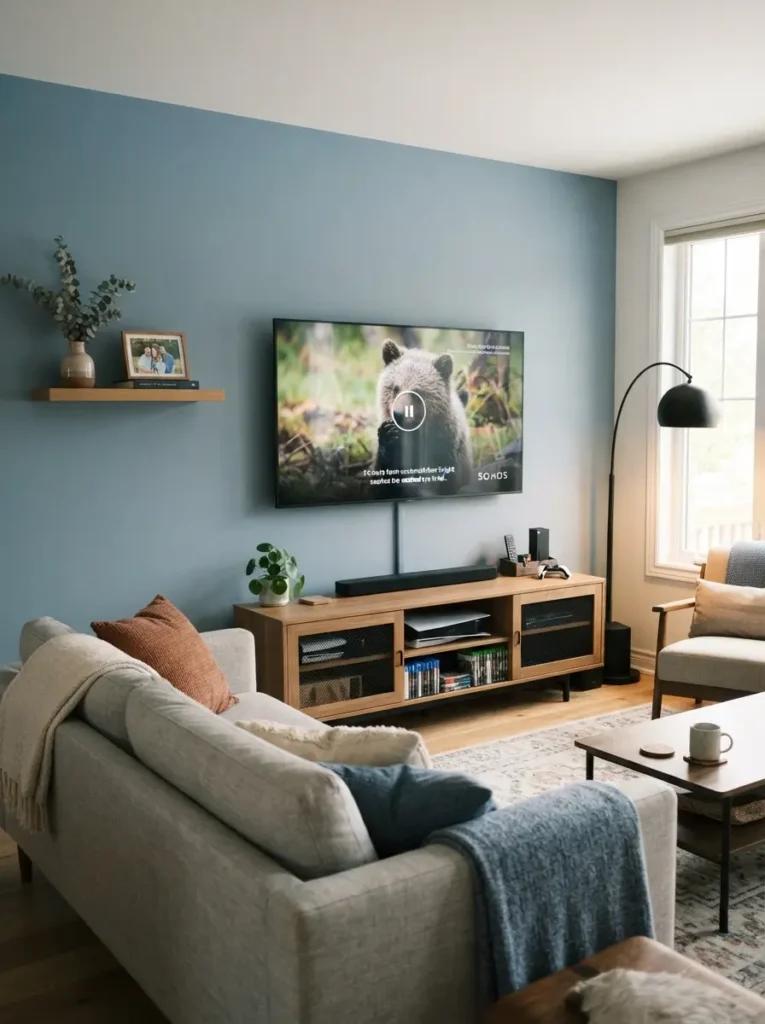
Television walls often become crowded with cables, speakers and mismatched storage. Plan the wall around the screen size, viewing distance and equipment before adding decor. Mount the television at comfortable seated eye level rather than close to the ceiling. Use a low cabinet with ventilated sections for devices and closed storage for games.
Paint the media wall a soft mid-tone such as mushroom, muted olive or dusty blue to reduce screen contrast without creating a dark cave. Add one or two shelves, but keep decoration limited so the screen remains the focus. Cable covers painted to match the wall offer a rental-friendly solution. Flexible media planning suits families who use the area for films, gaming and casual entertaining.
Viewing comfort improves when seating distance matches screen size. Before mounting, place cardboard at the proposed height and watch from each seat. Check reflections from windows and lamps during both daytime and evening use.
Create a Comfortable Guest Corner
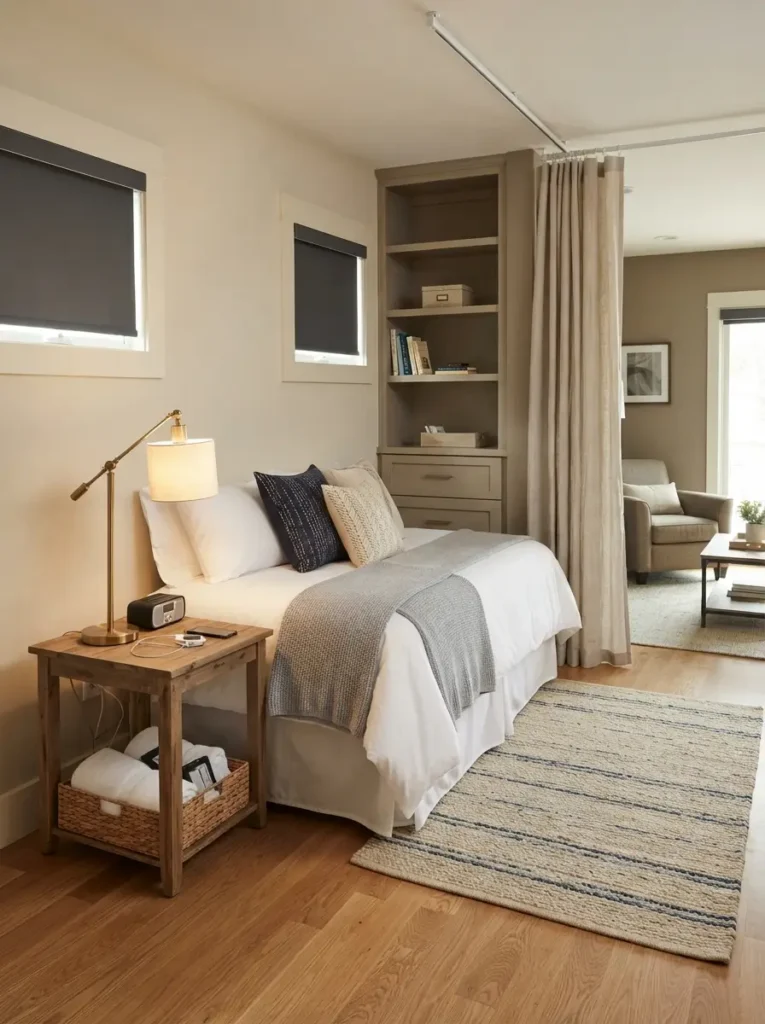
Guest accommodation does not always require a separate bedroom. Daybeds, sleeper sofas and wall beds can support occasional visitors while preserving everyday floor area. Choose a model that opens without blocking the main walkway. Provide a small table, reading lamp, charging point and basket for towels so guests do not need to search through storage.
Use layered bedding in breathable fabrics and add a washable rug beside the bed. Blackout blinds improve sleep where outdoor lights reach small windows. Keep storage available by leaving one drawer or shelf empty. Guest corners work best for homeowners who host occasionally and need the room to serve another purpose most of the year.
Privacy can come from a ceiling-mounted curtain track, folding screen or open bookcase. Choose dividers that leave enough space for ventilation and safe exit routes. Removable fabric panels are useful where permanent walls would make the room less flexible.
Add Plants That Tolerate Lower Light

Greenery softens hard surfaces and makes a lower level feel lived in, but plant choice should match the available light. Snake plants, ZZ plants, pothos and cast-iron plants cope with indirect or lower light better than sun-loving varieties. Artificial plants can work in completely windowless corners, especially when the leaves have varied shapes and a matte finish.
Place real plants near windows or under a suitable grow light with a timer. Avoid overwatering because cooler basement conditions slow soil drying. Use light-coloured pots to keep the arrangement visually bright. Plant styling is best for people who want simple basement inspiration without adding more furniture or permanent finishes.
Group plants in odd numbers and vary their height rather than lining identical pots along a sill. One floor plant, one medium pot and one trailing plant create depth while using little surface space.
Finish With Personal Items in Controlled Groups
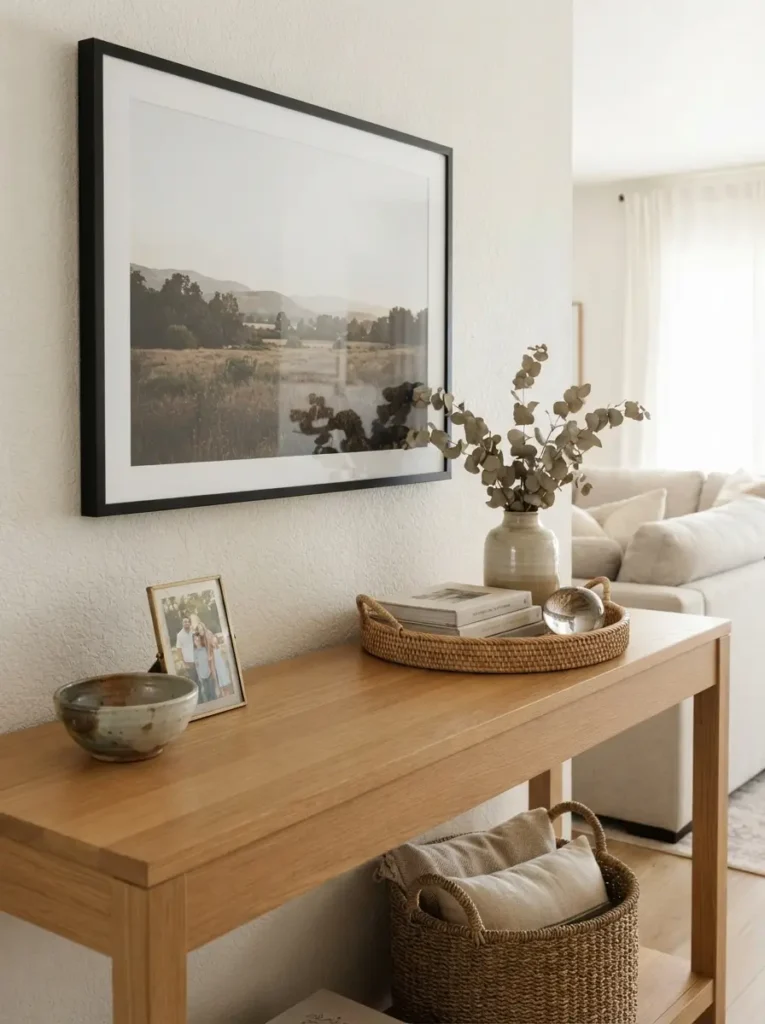
Personal objects make the room feel connected to the rest of the home. Family photographs, travel finds, books and handmade pieces work best when grouped rather than scattered. Use trays, matching frames or repeated shelf spacing to create order. Keep some surfaces empty so useful areas remain practical.
Display three to five items on a console, then store the rest and rotate them seasonally. Artwork should relate to furniture width; a piece above a sofa usually looks balanced when it measures about two-thirds of the sofa’s width. Avoid hanging frames too high because low ceilings make the gap more noticeable. Controlled styling suits beginners who want character without clutter.
Editing is easier when every display has a purpose. Keep remote controls, chargers and game pieces in attractive boxes, then reserve open shelves for objects worth seeing. Practical storage should support the styling rather than fight it.
Common Basement Decorating Mistakes to Avoid
Ignoring moisture is the most serious mistake. Paint, rugs and upholstered furniture can hide early signs of dampness, but they do not solve it. Check walls, floors, window wells and utility areas before decorating. Musty smells, peeling paint and repeated condensation deserve attention before new finishes are installed. Choose materials that suit the room’s conditions rather than copying an upstairs living room exactly.
Buying furniture before measuring access creates another common problem. Large sectionals may fit the floor plan but not the stairwell or doorway. Measure the full delivery route, including turns, railings and ceiling drops. Modular furniture, flat-pack cabinets and removable sofa legs reduce risk. Mark furniture dimensions on the floor with painter’s tape before ordering.
Using only cool white light can make pale walls look grey and unwelcoming. Match bulb temperatures and add task lighting near seats and work surfaces. Overdecorating every wall also reduces brightness because the eye has no quiet areas. Keep one or two surfaces simple, especially near windows and main walkways.
Pushing all furniture against the walls often leaves an empty centre and weakens conversation areas. Pull seating inward enough to create a clear group while keeping circulation open. Hiding every pipe or beam can also waste money. Consistent paint and careful lighting may produce a cleaner result than complicated boxing that reduces ceiling height.
Budget Friendly Ways to Improve the Space
Paint offers the largest visual change for a modest cost, especially when walls and ceilings have several mismatched finishes. Spend money on preparation, stain blocking and suitable primers rather than choosing the cheapest paint. Reusing the same neutral colour across connected walls also reduces leftover tins and makes touch-ups easier. Sample pots help prevent costly colour mistakes.
Second-hand furniture can work well when dimensions and condition are checked carefully. Look for solid coffee tables, bookcases, lamps and side chairs rather than used upholstered pieces with unknown damp or odour history. New washable covers can update a sound sofa, while replacement handles improve basic cabinets. Local marketplace listings often provide better value than buying every item new.
Lighting upgrades do not always require rewiring. Plug-in wall lights, floor lamps and rechargeable picture lights improve dark corners. Use matching LED bulbs to create even colour. Cable sleeves and adhesive clips keep cords organised. Smart plugs can control several lamps at once, which is useful when switches are located far from the seating area.
Textiles bring comfort without permanent work. Washable rugs, lined curtains, cushions and throws reduce echo and soften concrete or vinyl surfaces. Repeat two or three colours across these items instead of buying a matching set. Controlled repetition looks more considered and lets homeowners replace one piece at a time.
Practical Basement Makeover Tips for Beginners
Plan the basement makeover in phases rather than purchasing everything during one weekend. Start with repairs, moisture checks and lighting. Move to paint and flooring next, then add furniture, storage and decor. Phased work prevents new items from being damaged and allows the room’s actual needs to become clearer through use.
Photograph the space from each corner before shopping. Images reveal dark zones, awkward gaps and visual clutter that can be easy to ignore in person. Create a simple list with three columns: essential, useful and decorative. Spend first on items that improve safety, comfort or function. Decorative pieces should support the plan instead of competing with it.
Create a simple spending ceiling for each phase of the basement makeover and record purchases as they happen. Small unplanned accessories can quietly consume money needed for better lighting or storage. A written list keeps priorities visible while leaving room for one or two personal finds.
Keep a consistent palette of one light neutral, one medium tone and one accent colour. For example, warm white walls, light oak furniture and muted blue textiles create variety without making the room busy. Repeat finishes across zones so the open floor feels connected. Black metal can work as a small accent, but too much may visually lower the space.
Test the layout before fixing shelves or mounting a television. Move existing furniture into position, tape the proposed sizes on walls and live with the arrangement for several days. Real use often reveals blocked paths, screen glare or missing side tables. Small corrections are easier before drilling or purchasing custom pieces.
Comfort should guide final decisions as much as appearance. Sit in every planned seat and check whether tables, lamps, sockets and storage are within easy reach. Notice cold draughts near windows and warmer areas close to utility equipment. Moving a chair half a metre may solve a comfort problem without buying anything. Families should also test how the room works when several people use it together, since an attractive arrangement can fail when doors, drawers and walkways compete during daily routines.
Maintenance deserves planning before the room is finished. Choose washable paint near play areas, removable cushion covers around food zones and accessible storage for cleaning supplies. Leave inspection points, electrical panels and valves unobstructed, even when screens or cabinets hide them visually. Write down paint names, bulb temperatures and flooring details for future repairs. Consistent replacements prevent one damaged area from turning into a larger redecorating job. Practical finishes are especially valuable in homes with children, pets or frequent overnight guests. Simple records also make later shopping faster, cheaper and far less confusing overall.
Seasonal checks help the lower level stay comfortable throughout the year. Compare humidity, temperature and natural light during wet weather, summer heat and winter cold. Furniture that works in July may sit too close to a draught in January. Portable lamps, layered throws and movable side tables allow small adjustments without changing the whole design. Keep a compact dehumidifier location in mind where needed, but avoid blocking airflow with curtains or storage boxes. Flexible planning protects both comfort and decorative materials over time.
Frequently Asked Questions
How can I make a dark basement feel brighter?
Use pale warm wall colours, several light sources and simple window coverings. Place lamps at different heights so light reaches the centre and corners. Mirrors can help when they reflect a window or lamp rather than a blank wall. Keep tall storage away from windows and choose furniture with visible legs to preserve a sense of openness.
What colours work best in a small basement?
Warm white, ivory, pale greige, light mushroom and soft beige usually perform well in limited daylight. Muted blue, sage and dusty terracotta can add controlled colour through textiles or a small feature area. Test samples under the room’s actual bulbs because cool lighting can shift warm paint toward grey or green.
How much should I spend on a basement makeover?
Cost depends on the room’s condition and the amount of structural work required. Decorating-only changes may involve paint, lamps, rugs and second-hand furniture, while moisture repair, electrical work and flooring raise the budget. Set aside money for practical issues first, then divide the remaining amount between lighting, seating, storage and finishing details.
What flooring is practical for a basement living area?
Luxury vinyl plank, sealed concrete, carpet tiles and suitable laminate are common choices, but the right option depends on moisture conditions and subfloor preparation. Washable rugs can add warmth over hard flooring. Avoid installing moisture-sensitive materials until leaks, condensation and floor movement have been assessed.
Can renters improve a basement without permanent changes?
Renters can use removable wallpaper, plug-in sconces, floor lamps, freestanding shelves, tension rods and large rugs. Adhesive hooks and cable channels help organise walls when the lease allows them. Keep original fittings safely stored and photograph the room before making changes. Written approval is sensible for anything involving drilling or paint.
Which improvement should come first?
Moisture and safety should come first, followed by lighting and layout. Paint and decor cannot compensate for damp walls, blocked exits or poor electrical access. Once the practical problems are handled, choose a light colour plan and arrange the largest furniture pieces before buying accessories.
Conclusion
Good lower-level design comes from solving practical limitations in the right order. Moisture control, measured layouts, layered lighting and suitable materials create a reliable foundation. Lighter colours, warm wood, low-profile furniture and organised storage then make the room feel more comfortable and connected to the rest of the home.
Successful decorating does not require every surface to be new. Careful editing, second-hand furniture, removable treatments and well-placed lamps can produce meaningful improvements. Treat the basement makeover as a sequence of useful decisions rather than one large shopping project. The result will be easier to maintain, more flexible and better suited to daily life.