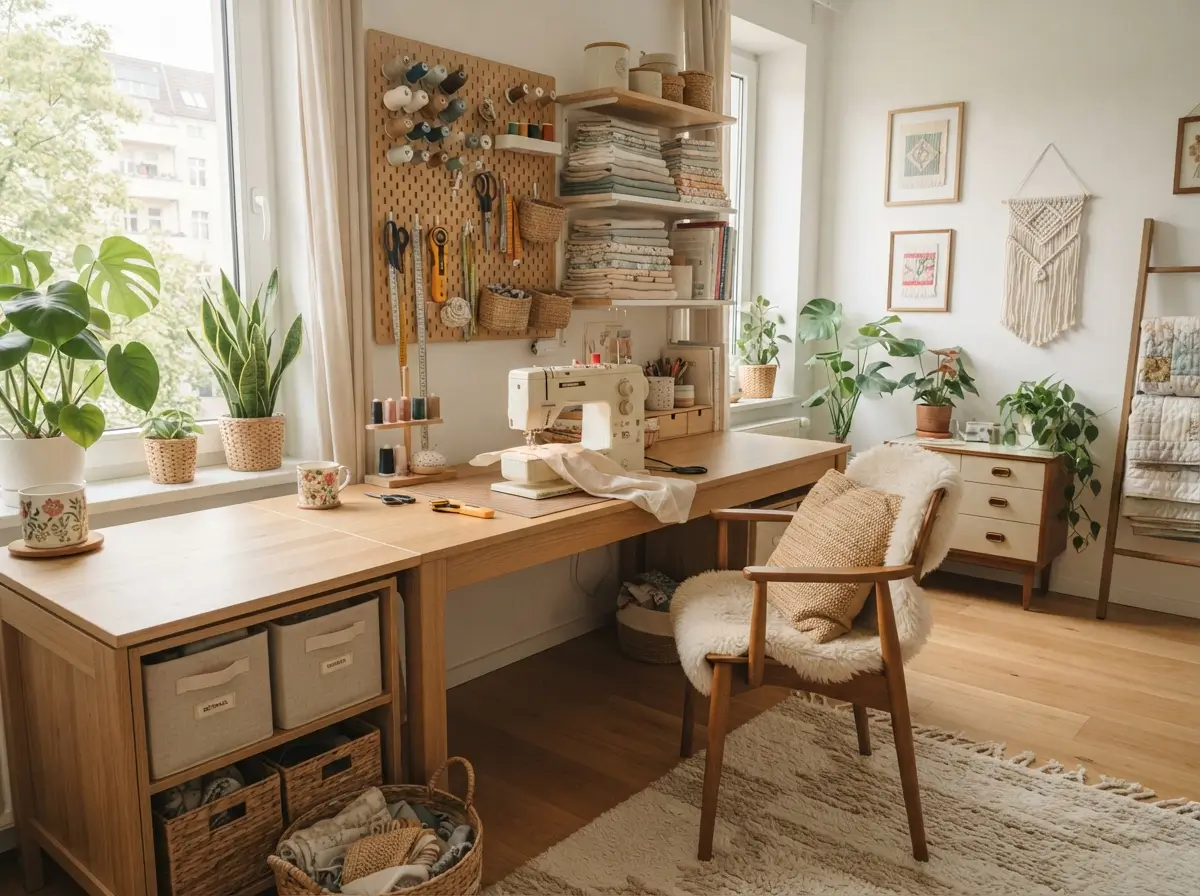

Small apartments can support serious sewing without feeling crowded or chaotic. Thoughtful apartment sewing room decor balances three needs at once: enough workspace for cutting and stitching, organised storage for tools and fabric, and a calm visual style that still belongs with the rest of your home. Good design matters because sewing creates many small items that quickly spread across tables, chairs, and floors. Clear zones, closed storage, gentle colours, and flexible furniture keep the room useful between projects.
Beginners often assume they need a separate craft room, yet a wall, corner, alcove, or section of a bedroom can work beautifully. The goal is not to display every spool or fabric bundle. Instead, choose what deserves to stay visible, hide visual clutter, and make daily setup easy. Each idea below includes practical measurements, rental-friendly options, lighting guidance, and common-sense choices for real apartment living.
Can a Small Apartment Sewing Area Feel Calm?
Yes, a small sewing area can feel calm when storage, colour, light, and furniture follow one clear plan. Successful apartment sewing room decor keeps frequently used tools within reach while moving backup supplies into labelled drawers, boxes, or cabinets. Furniture with slim legs also leaves more visible floor space, which makes a compact room feel lighter.
Ask one question before buying anything: what task causes the most frustration in your current setup? Limited cutting space, tangled thread, poor lighting, and fabric piles require different solutions. Solving the biggest daily problem first will create more comfort than buying decorative objects that do not improve how the room works.
Plan the Space Before Decorating

Planning starts with a simple inventory of tasks, not a shopping list. Write down where you sew, cut, press, pin, store patterns, and photograph finished work. Note which tasks happen every week and which happen only occasionally. Frequent tasks deserve permanent space, while occasional ones can use folding or mobile furniture. Someone who mainly repairs clothing needs far less surface area than a quilter handling large pieces. Matching the room to actual habits keeps furniture useful and prevents decorative storage from consuming valuable floor space.
Measurements should include more than the empty wall. Record the sewing machine width, machine depth, power-cord direction, pedal position, chair movement, and the largest fabric piece you usually handle. Include room features such as radiators, windows, sockets, doors, and skirting boards. Beginners often measure furniture but forget the space required to use it. Mark proposed furniture outlines with painter’s tape, then sit, turn, stand, and reach as though the setup already exists. Small conflicts become obvious before money is spent.
Workflow becomes easier when tools follow the order of the job. Store patterns and fabric near the cutting surface, keep pins and marking tools between the cutting and machine zones, and place pressing equipment where hot items can rest safely. Compact rooms rarely support three separate stations, so allow one surface to perform several jobs in sequence. A heat-resistant pressing mat can turn a cabinet top into a temporary pressing point. Returning each item after its stage prevents the desk from becoming a pile of half-finished steps.
Visual boundaries help a sewing corner belong inside a bedroom, lounge, or dining area. Use one rug, one wall colour, a narrow cabinet, or repeated wood finishes to define the zone without building a physical divider. Curtains and tall screens may block light or make a small room feel tighter. Low furniture usually preserves longer sightlines. People sharing the room should also agree on where the sewing area ends, especially when pins, cords, and fabric could spread into common walking paths.
Temporary testing is useful before any permanent change. Work with the proposed layout for one or two projects using existing tables, boxes, and lamps. Notice where thread collects, which drawer feels awkward, and whether the chair blocks traffic. Real use reveals needs that mood boards cannot predict. Adjust the arrangement before drilling, painting, or buying matching organisers. Patient testing produces a calmer setup because each addition solves an observed problem rather than filling an empty-looking area.
17 Practical Sewing Room Decor Ideas
Build the Room Around One Clear Work Zone

Start with the activity that occupies most of your sewing time. Garment makers may need a wide cutting surface, while quilters often need wall space for layouts and organised fabric storage. Place your sewing machine, task lamp, thread, scissors, and current-project basket within one arm’s reach. Keeping the main tools together reduces repeated movement and prevents supplies from travelling around the apartment.
People using a bedroom corner or living room wall will benefit most from this approach. Choose a desk between 100 and 140 centimetres wide, then leave at least 75 centimetres behind the chair for comfortable movement. Position the work zone near daylight when possible, but keep the machine out of harsh direct sun, which can fade fabric and create glare on shiny surfaces.
Choose a Soft Neutral Base With One Muted Accent
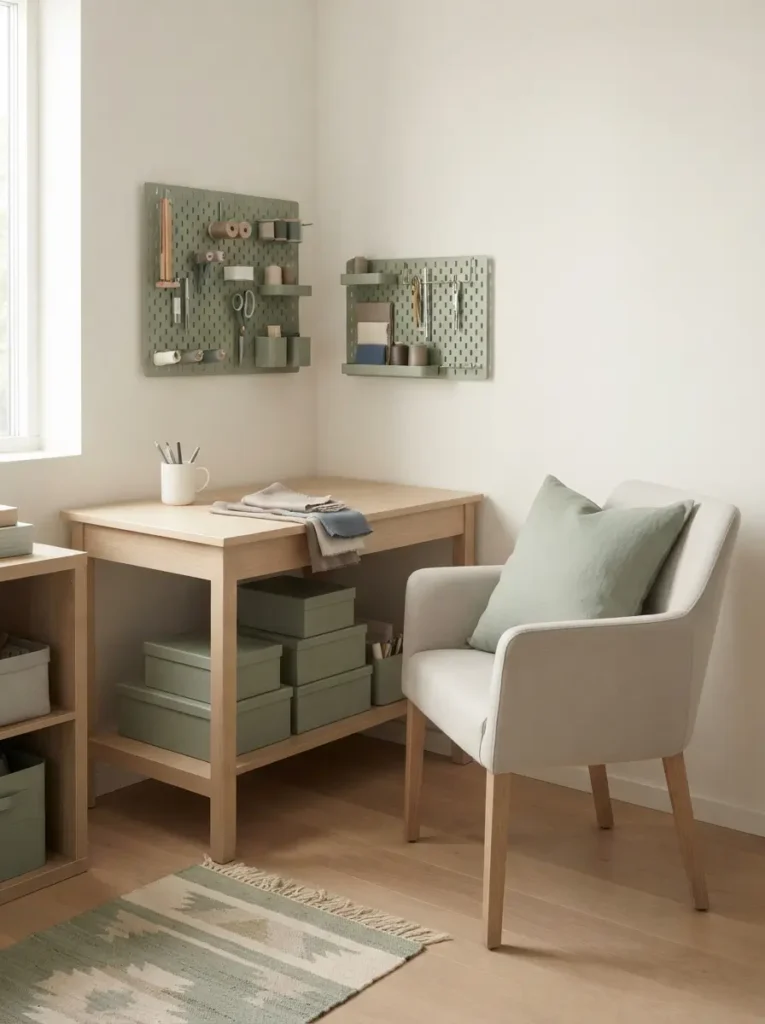
Calm rooms usually rely on a limited colour palette rather than many competing shades. Warm white, light greige, soft mushroom, pale oak, and dusty blue create a restful base without making the room look dull. Add one muted accent through a chair cushion, storage labels, pegboard, or small rug. Limiting the accent colour helps scattered tools look more intentional.
Renters and beginners who feel unsure about colour will find this method easy to manage. Try warm white walls with sage storage boxes, or pale grey furniture with terracotta accessories. Avoid using bright colour on every organiser because thread and fabric already contribute plenty of visual detail. Repeating the chosen accent three or four times around the space creates balance without unnecessary decoration.
Use a Fold-Down Table for Flexible Floor Space

Wall-mounted drop-leaf tables provide a proper sewing surface without permanently blocking the room. Look for a model at least 50 centimetres deep so the machine sits securely, and check the weight rating before installation. Add folding legs or strong brackets underneath if the machine is heavy. When closed, the table can resemble a slim console or wall panel.
Studio residents and anyone sharing a multipurpose room will gain the most from this layout. Rental agreements may restrict drilling, so a freestanding gateleg table can provide similar flexibility. Keep one rolling cart nearby for tools and unfinished projects. Folding the table after each session restores walking space and creates a visual boundary between sewing time and everyday home life.
Add Closed Cabinets to Reduce Visual Noise

Open shelves look attractive when carefully styled, but sewing supplies rarely stay picture-ready during active projects. Doors and drawers hide mixed packaging, colourful scraps, instruction sheets, and spare equipment. Choose a shallow cabinet between 30 and 40 centimetres deep so it stores supplies without dominating the room. Adjustable shelves make the interior useful for changing project sizes.
Households that use a sewing corner inside a living room will appreciate closed storage most. White or wood-front cabinets blend with standard home furniture and prevent the area from looking like a stockroom. Place less attractive items inside, then leave only a few useful pieces visible. One basket, a lamp, and a framed swatch can provide warmth without creating another surface to maintain.
Install a Slim Pegboard for Everyday Tools

Pegboards keep scissors, rulers, rotary cutters, and small baskets visible without taking over the desk. Choose a narrow board that matches the width of the workstation rather than covering the entire wall. Keeping the display contained makes it easier to maintain. Arrange tools by use, placing frequently handled items near the centre and decorative items toward the edges.
Visual organisers and people who forget what they own will benefit from this system. Renters can mount a small pegboard on a leaning frame, the back of a freestanding shelf, or a plywood panel secured to the desk. Leave some empty space between groups of tools. Crowded boards create visual tension, while breathing room makes the display easier to scan and keeps the compact sewing corner feeling controlled.
Create a Calm Thread Display With Repeated Colours

Thread racks can become colourful focal points, yet random arrangements often look busy. Sort spools by colour family, value, or thread type, then keep rarely used colours in drawers. Wooden racks suit warm, natural interiors, while white metal racks work well in crisp modern rooms. Protect expensive thread from direct sunlight and heavy dust.
Regular machine sewists who reach for thread daily will find an open display practical. Limit the rack to the colours used most often and leave roughly ten percent of the pegs empty for new spools. Repeating colours in gentle groups creates order and helps you notice gaps before starting a project. Matching labels on nearby bins will connect the display to the wider room.
Use Clear Boxes Only Inside Larger Storage Units

Transparent boxes help you see supplies quickly, but rows of visible contents can make a room feel restless. Place clear containers inside cabinets, wardrobes, or cube units, then label the short edge so boxes remain easy to identify. Standardising two or three box sizes also improves stacking and prevents wasted shelf space.
People with deep collections of notions, zips, elastic, and trims will benefit from this layered system. Keep matching categories together, such as garment fasteners in one drawer and bias tape in another. Avoid buying tiny containers for every item because they become difficult to maintain. Larger categories support faster cleanup and make the sewing area look more like part of the home.
Turn Fabric Storage Into a Controlled Colour Feature
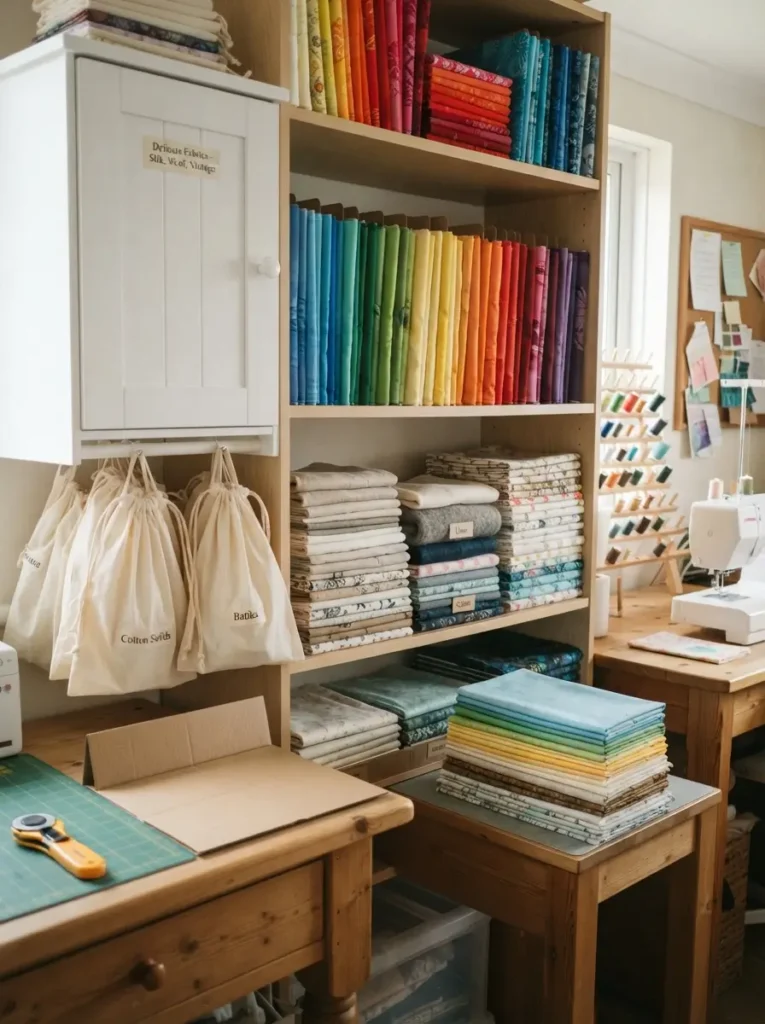
Fabric can add texture and personality when displayed selectively. Fold pieces to the same width using a simple cardboard template, then arrange them vertically or in short horizontal stacks. Keep only stable, frequently used fabrics in open storage. Delicate, expensive, or light-sensitive materials belong behind doors or inside breathable cotton bags.
Quilters and fabric collectors with attractive coordinated collections will enjoy this method. Grouping fabric by colour works well for visual selection, while grouping by fibre or project type suits practical planning. Do not stack piles higher than 25 to 30 centimetres because lower pieces become difficult to remove. Consistent folds create a quieter surface than uneven bundles or plastic shopping bags.
Bring in Warm Task Lighting for Evening Sewing

General ceiling lights rarely provide enough focused illumination for dark thread, small stitches, or accurate cutting. Add an adjustable desk lamp with a high colour-rendering rating and place it on the opposite side of your dominant hand to reduce shadows. A bulb between 3500K and 4000K offers a balanced, clear light without feeling harsh or overly blue.
Night-time sewists and people working in rooms with limited windows need this improvement most. Combine the task lamp with a warmer 2700K to 3000K floor or table lamp elsewhere in the room. Layered lighting keeps the sewing surface precise while preserving a relaxed mood around it. Avoid exposed bright bulbs at eye level because glare causes discomfort during long sessions.
Place a Washable Rug Under the Work Area

Small rugs visually define a sewing zone, soften hard flooring, and reduce chair noise in apartments. Choose a low-pile, tightly woven rug so dropped pins and thread remain easy to spot. Flatweave cotton, washable synthetic fibre, or indoor-outdoor material works better than shag, which traps scraps and interferes with rolling chairs.
Open-plan renters and people creating a sewing corner in a bedroom will find this especially useful. Size the rug so the desk and front chair legs sit on it, usually around 120 by 180 centimetres for a compact setup. Select a subtle pattern that hides lint without concealing sharp objects. Vacuum often and use a magnetic sweeper before washing or shaking the rug.
Add a Narrow Rolling Cart for Active Projects

Rolling carts hold current tools without turning the main desk into a storage shelf. Assign the top level to daily equipment, the middle to project materials, and the bottom to heavier items or backup supplies. A cart around 35 centimetres wide can slide beside a desk, under a cutting table, or into a wardrobe when not needed.
Multi-project sewists and renters who move their setup between rooms will value the flexibility. Use shallow trays inside each level so small notions do not disappear into deep baskets. Avoid treating the cart as permanent overflow storage. Reset it after finishing a project, return tools to their proper locations, and keep only the next active task ready for use.
Use a Full-Length Mirror as Functional Decor

Sewing garments without a full-length mirror leads to repeated trips between rooms and makes fitting less accurate. Position a slim mirror near the sewing zone, leaving enough space to step back. Rounded corners, a pale wood frame, or a simple black edge can connect the mirror to existing furniture without making the area feel overly decorated.
Garment makers, costume sewists, and beginners learning fit adjustments will benefit most. Renters can use an over-door mirror, leaning floor mirror, or removable mounting strips rated for the mirror’s weight. Place the mirror where it reflects daylight or an uncluttered wall rather than a crowded shelf. Helpful reflections make a small room feel brighter and more spacious.
Create a Small Inspiration Rail Instead of a Busy Gallery

Large mood boards can quickly become crowded with sketches, swatches, receipts, and unfinished ideas. A narrow picture ledge, magnetic strip, or wire rail offers a more controlled alternative. Display three to five items connected to the current project, then rotate them when your focus changes. Limited displays support creativity without becoming visual clutter.
Design students, pattern makers, and people who collect references will find this approach useful. Keep the rail above eye level but low enough to update easily. Choose clips in one finish, such as matte black, brass, or natural wood. Pairing a fabric swatch with one sketch and one colour card creates a clear story and prevents unrelated inspiration from competing for attention.
Hide Large Textiles in Dual-Purpose Furniture
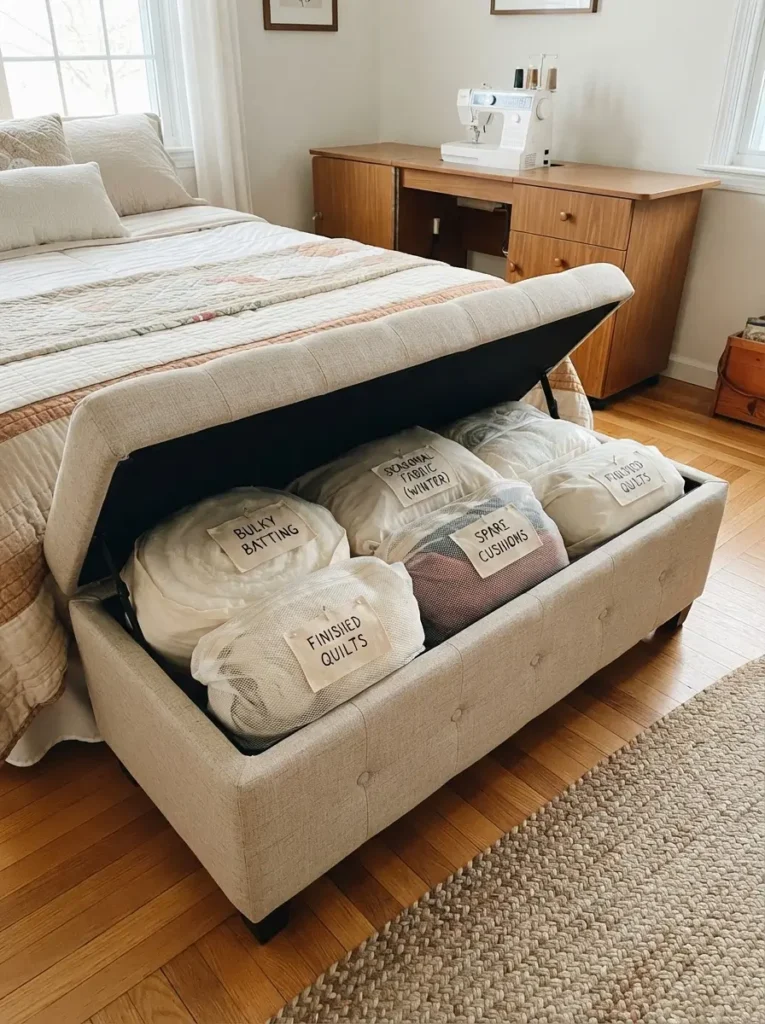
Bulky batting, seasonal fabric, spare cushions, and finished quilts need more volume than small bins can provide. Storage benches, ottomans, and under-bed drawers offer discreet capacity without adding another cabinet. Use breathable fabric bags inside the compartment and label them by category. Avoid tightly compressing delicate textiles for long periods.
People sewing in bedrooms or combined guest rooms will benefit from this idea. Upholstered benches also provide seating for fitting shoes, reviewing patterns, or welcoming a friend. Similar strategies used for blanket storage and comforter storage work well for large sewing materials. Keep heavy rolls low and lighter pieces higher so access remains safe and convenient.
Lean a Ladder Rack Against the Wall for Works in Progress
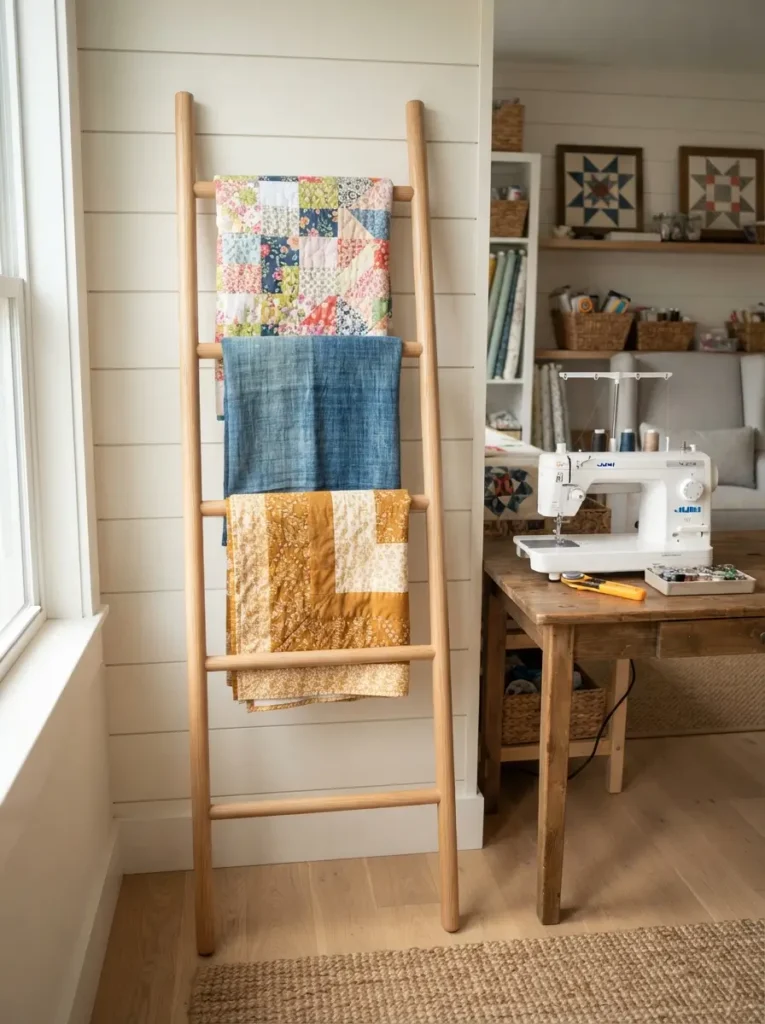
Decorative ladder racks provide vertical storage for quilt tops, pressed fabric lengths, and finished pieces waiting to be photographed. Choose a narrow design with smooth rungs that will not snag delicate fibres. Keep the ladder slightly away from the sewing machine so hanging textiles do not collect oil, dust, or loose thread.
Quilters and makers who regularly rotate projects can use this display effectively. A wood blanket ladder adds warmth to white or grey rooms, while a slim black metal version suits modern furniture. Limit the rack to two or three pieces and fold them evenly. Overloading it creates a laundry-room impression and makes each textile harder to remove without disturbing the others.
Choose a Supportive Chair That Still Looks Light
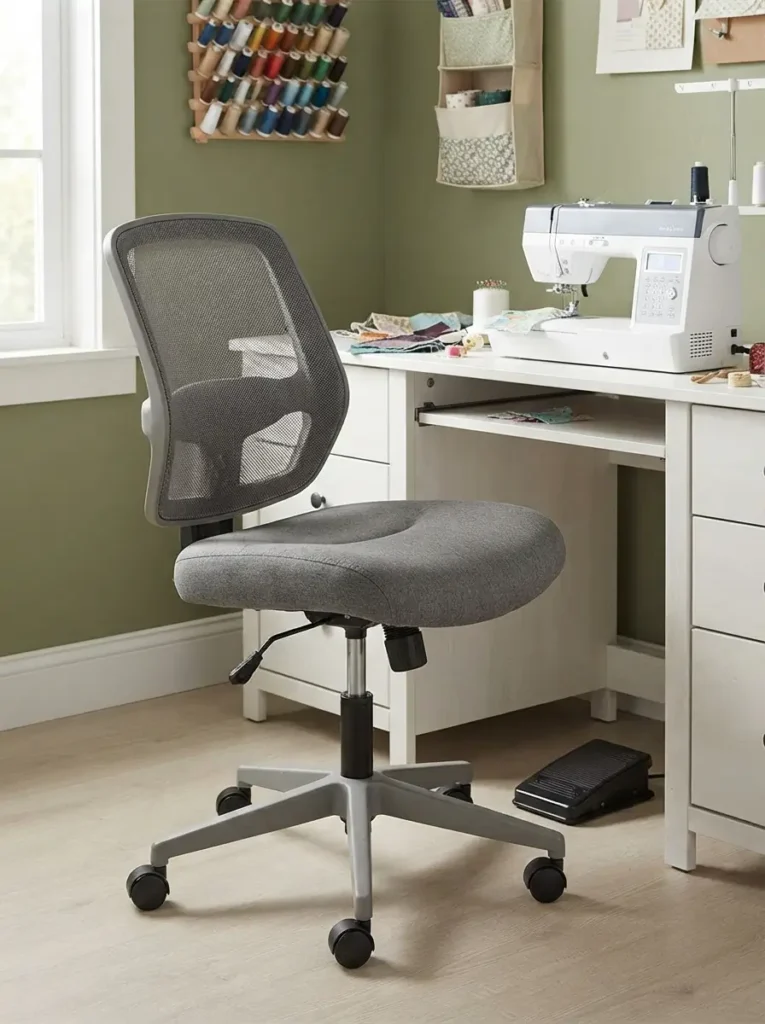
Sewing chairs need more support than decorative dining chairs, especially during long sessions. Look for adjustable height, a firm seat, a comfortable back, and enough freedom for your feet to control the machine pedal. Armless designs often slide under desks more easily and allow unrestricted elbow movement while guiding fabric.
Frequent sewists and anyone with a narrow workstation should prioritise this purchase. Choose upholstery in grey, beige, olive, or another mid-tone that hides lint better than pure black or white. Slim legs, a mesh back, or an open frame reduce visual weight. Measure the desk opening before buying because wide chair bases can block drawers or damage nearby walls.
Finish With One Useful Personal Detail

Personal decoration works best when it also supports the sewing routine. Frame a favourite pattern cover, display a handmade pincushion, use a ceramic cup for marking tools, or place a small plant where it will not interfere with fabric. One meaningful object gives the area character without competing with practical equipment.
Minimalists, beginners, and people decorating a shared living space will appreciate this restrained finish. Choose something connected to your craft rather than generic wall art bought only to fill space. Rotate the item seasonally or after major projects. Purposeful details make the room feel personal, while controlled quantities preserve the calm atmosphere created by the thoughtful overall design.
Common Sewing Room Decor Mistakes to Avoid
Overfilling walls is one of the most common mistakes in a compact sewing area. Pegboards, shelves, artwork, thread racks, and inspiration boards may each look useful, but combining all of them on one wall creates visual pressure. Select one primary wall feature, then let the surrounding area stay quiet. Empty wall space is not wasted space; it gives the eye somewhere to rest.
Ignoring the chair path causes another practical problem. Drawers, storage cubes, and carts may fit beside the desk when the chair is pushed in, yet block movement while you sew. Test the complete working position before committing to the layout. Sit down, pull out fabric, open drawers, and move the chair backward. Leave enough clearance to stand without hitting furniture.
Poor lighting choices can make beautiful decor uncomfortable. Very cool bulbs above 5000K may feel clinical in a bedroom or living area, while very warm bulbs can distort thread and fabric colours. Use balanced task lighting near the machine and softer ambient lighting elsewhere. Matching every bulb is less important than assigning each light a clear purpose.
Buying organisers before sorting supplies often wastes money. Containers should respond to real categories and quantities, not imagined future needs. Lay out your tools, group similar items, measure each group, and then select storage. Empty organisers can encourage unnecessary buying, while containers that are too small create overflow almost immediately.
Displaying every fabric and notion also makes cleaning harder. Dust settles on thread, open baskets, machine covers, and folded textiles. Keep everyday materials visible and place backup stock behind doors. Calm apartment sewing room decor depends on editing, not simply arranging more objects in attractive rows.
Choosing the wrong worktop height can cause shoulder and back strain even when the room looks well arranged. Standard desks usually suit machine sewing, but regular standing cuts may require a higher surface. Instead of replacing the desk, place a sturdy cutting board on a stable riser that cannot slide. Test height with relaxed shoulders and straight wrists. Furniture should support the body first, because discomfort will eventually make even the most attractive sewing corner frustrating to use.
Creating too many narrow categories can also slow cleanup. Separate boxes for every button colour or each short ribbon length may appear organised, yet the system becomes tiring after a busy session. Use broad labels such as buttons, fasteners, trims, and machine accessories, then add small dividers only where needed. Storage should be easy enough to reset when energy is low. Practical organisation survives ordinary habits; complicated systems usually collapse into nearby bags and unlabelled piles.
Budget-Friendly Sewing Room Styling Tips
Begin by improving what you already own. Matching mismatched boxes with simple paper labels can create more order than buying a full organiser system. Reuse sturdy shoe boxes inside cabinets, cover damaged tabletops with removable vinyl, and place inexpensive drawer liners beneath tools. Small changes often improve daily function without changing the entire room.
Second-hand furniture offers strong value when measurements come first. Search for narrow desks, office drawers, kitchen trolleys, small bookcases, and bedside cabinets rather than furniture marketed specifically for craft rooms. Standard home pieces usually cost less and blend more naturally into an apartment. Check stability, drawer movement, and surface height before bringing anything home.
Removable upgrades suit renters and help control costs. Adhesive hooks can hold lightweight rulers, tension rods can create fabric storage inside cupboards, and clip-on lamps avoid electrical work. Use wall-safe products within their stated weight limits and test them in a hidden area. Heavy shelves, mirrors, and machines require secure support rather than improvised adhesive mounting.
Spend more on items that affect comfort and safety, especially the chair, task light, and stable work surface. Save on baskets, labels, decorative frames, and fabric-covered storage boxes. Dividing the budget by function prevents attractive accessories from using money needed for proper lighting or ergonomic seating.
Sample pots, leftover wallpaper, fabric offcuts, and wrapping paper can refresh small surfaces cheaply. Line drawer fronts, cover a corkboard, or add colour inside an open cube rather than redecorating the whole wall. Keep patterns simple so they do not compete with printed fabric. Removable materials are especially useful for renters, although adhesives should always be tested. Using one repeated offcut across labels, trays, and a pinboard can make unrelated second-hand pieces feel like a coordinated set.
Modular purchases stretch a small budget because they can adapt when the room changes. Stackable drawers, matching lidded boxes, adjustable shelves, and carts with removable trays work in many future layouts. Buy one unit, live with it, and add another only when the category truly needs more space. Avoid large fitted organisers designed around a temporary hobby phase. Flexible pieces can move from a sewing corner to a wardrobe, office, or utility cupboard without becoming waste.
Cost planning works best when purchases are ranked by impact. Fix unsafe or uncomfortable problems first, such as a wobbling table, poor lamp, damaged cable, or unsuitable chair. Organisation comes second, followed by decorative upgrades. Set aside a small amount for labels, hooks, and replacement blades because these details improve daily use. Waiting for sales on nonessential decor prevents impulse buying. A calm room often costs less when every object earns its place through comfort, storage, or regular use.
Apartment Sewing Room Decor Tips for Small Homes
Successful apartment sewing room decor begins with accurate measurements. Record wall width, socket locations, skirting-board depth, window clearance, door swing, and the space needed behind your chair. Furniture that technically fits may still make the room difficult to use. Masking tape on the floor can show the true footprint before you buy.
Vertical storage should support rather than overwhelm the room. Keep heavy equipment below waist height, daily tools between waist and eye level, and rarely used lightweight items higher up. Reaching above the machine with scissors or boxes creates unnecessary risk. Secure tall furniture according to the manufacturer’s instructions, especially in homes with children or pets.
Daily resetting keeps the room calm more effectively than occasional deep organisation. End each session by covering the machine, returning sharp tools, emptying the scrap bowl, and placing the active project in one container. Five focused minutes prevent several days of clutter. Clear surfaces also make it easier to begin the next session without moving unrelated supplies.
Material care deserves a place in the layout because apartments often have changing heat, humidity, and sunlight. Keep fabric away from damp exterior walls, hot radiators, and strong afternoon sun. Store natural fibres in breathable bags rather than sealed plastic when long-term moisture could become trapped. Place a small lidded bin near the machine for thread ends and sharp scraps, then empty it regularly. Households with children or pets should use closed containers for pins, rotary cutters, needles, and seam rippers. Safe storage may look less decorative than open displays, but it protects people, tools, and carefully collected materials while keeping the room ready for relaxed use without clutter.
Frequently Asked Questions
How do I set up a sewing room in a studio apartment?
Choose one wall or corner and define it with a compact desk, low-pile rug, task lamp, and closed storage. Keep furniture narrow and use a rolling cart for active tools. A folding table can provide extra cutting space, while a curtain or cabinet door can hide supplies when the room returns to everyday use.
Which colours make a small sewing room feel calmer?
Warm white, soft greige, pale oak, dusty blue, muted sage, and gentle mushroom tones work well because they sit quietly behind colourful fabric and thread. Select one main neutral, one supporting material, and one muted accent. Repeating the same finishes across containers and furniture creates more calm than adding many decorative colours.
How can renters add sewing storage without damaging walls?
Freestanding shelves, over-door organisers, tension rods, rolling carts, and storage ottomans provide useful capacity without permanent installation. Small pegboards can attach to desk frames or lean against walls. Removable hooks suit lightweight tools, but heavy mirrors, shelves, and equipment should follow the lease rules and proper safety requirements.
What furniture is most important in a sewing corner?
Stable desk, supportive chair, adjustable task lamp, and nearby storage together form the essential base. Choose the desk according to the machine size and your main sewing activity. Cutting large patterns may require a folding extension, while small repairs may only need a compact surface and a well-organised drawer unit.
How do I stop a sewing room from looking cluttered?
Limit open storage to attractive items used often, then hide backup supplies behind doors or inside drawers. Standardise container sizes, use clear labels, and maintain one basket for the current project. Leaving some wall and shelf space empty helps the eye rest and makes the displayed materials easier to understand.
Can sewing supplies stay in bedroom storage?
Many sewing supplies can stay in bedroom cabinets, under-bed drawers, wardrobes, or benches when they remain clean, dry, and safely contained. Sharp tools should be secured, fabrics should breathe, and heavy items should stay low. Separating active projects from long-term stock keeps bedroom storage easier to manage.
Conclusion
Calm sewing spaces do not depend on large rooms or expensive fitted furniture. They depend on clear priorities, measured layouts, useful lighting, controlled colour, and storage that matches real habits. Start with the task you perform most, then shape the furniture and organisation around that activity. Every decorative choice should either improve comfort, reduce clutter, or make the area feel connected to the rest of the home.
Thoughtful apartment sewing room decor can turn a small corner into a dependable creative zone without taking over the apartment. Begin with one practical change, such as better task lighting, closed storage, or a stable folding surface. Once the basic workflow feels easy, add colour, texture, and personal details slowly. Calm rooms usually grow through careful editing rather than constant buying.